


This Shrimp is based on the perfect Leo Shrimp, which was designed by the Danish fly tyer, Kern Leo Lund. His Shrimp is a fantastic piece of realism, and is a wonderful piece of art, but it’s very difficult to tie, especially the legs.
When I first saw it, I was searching for a Shrimp pattern which has the same looks but was easier to tie, so it was worth me fishing with it. Although I tie a lot of realistic flies, a fishing fly needs to be tied quickly and also be durable.
A portrait of the author, a brilliant fly tier and fisherman
Research
If you study the type of shrimps that coastal sea trout feed on, then this is a very good representation of the natural food item. Imitating the natural makes perfect sense if you want to catch good numbers of quality fish.
Forming the legs on the Leo Shrimp is the most difficult part of the dressing and, after much trial and error I developed an easier, different way to make and tie in the legs. Tied this way, the legs never twist and are always in perfect alignment.

The Put Shrimp is an excellent fly to catch a variety of fish feeding on shrimp
When to use
The Shrimp is my first choice for Danish sea trout, but also here at home, in Holland, I use it for both bass and mackerel in the sea.
Sea trout devour these shrimp in large numbers from the sand, rocks and weed just off the shoreline. If they are hard on the feed then they will jump on the JP Shrimp without hesitation, and if they are browsing the shallows and on the hunt for food, then this is a pattern which will also attract their attention and persuade them to take.
It can be fished on a floating line and long leader, in a nymph-like presentation with short and long pull-pause strips, but I also like to fish it on a slow intermediate line, which keeps the Shrimp fishing at the trout’s feeding level.
If you fish on the coast, then I’m sure you will have as much fun tying and fishing it as I do. Happy tying.
JP Shrimp Materials
Hook: Ahrex NS 122, size 4. Front 6mm bent down.
Tying silk: Dyneema 50 denier.
Rib: Tying thread.
Body: Ice dubbing tan.
Leg: Bracelet elastic.
Wing shield: Vinyl Shrimp Shell (Pro Sportfisher, Lakeland Flytying).
Eyes: Easy shrimp eyes (or think mono, melted at the end and coloured black).
Feelers: Polar bear tan or bucktail.
Markers pens.
Stage-by-Stage process
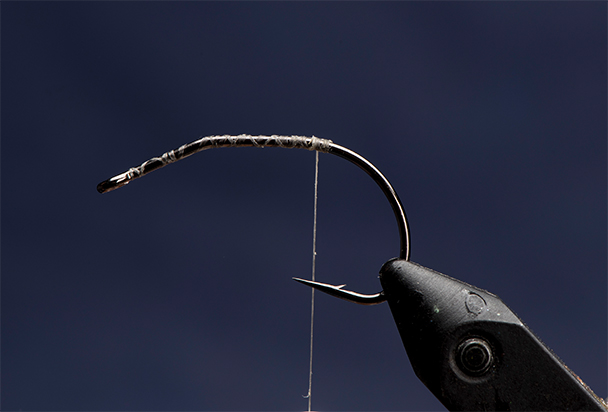
Stage 1: Hook is an NS 122 #4. Tie on the tying thread and let it hang between the hook-point and barb.
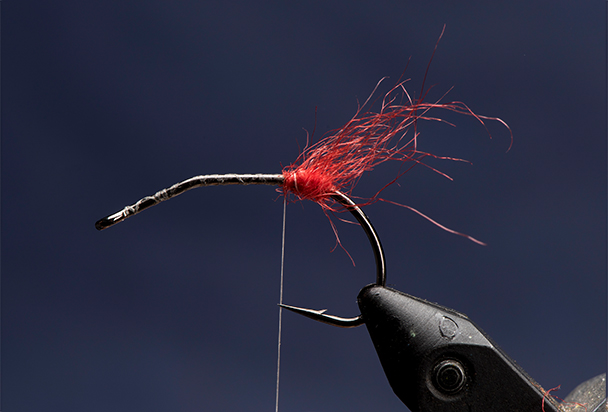
Stage 2: Add a small portion of red seal’s fur. Dub a small bump with the dubbing. Brush it out forward and upwards.
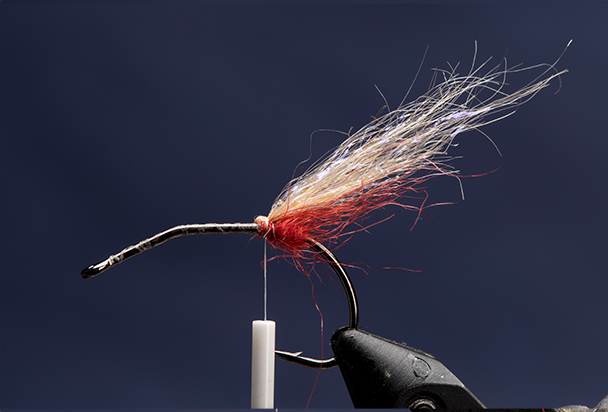
Stage 3: Add a small portion of Ice dubbing and lie it along the shank in strings. Te it in in front of the red dubbing. Fold it to the rear of the hook and tie it down so it kicks up an angle over the red dubbing.
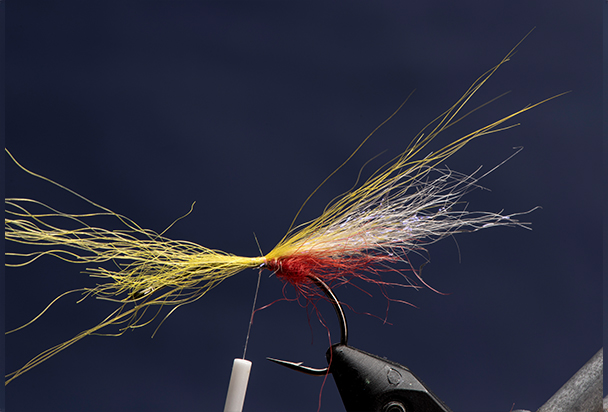
Stage 4: Add a few fibres from polar bear (or bucktail as a substitute). Tie them in a bit longer the Ice Dub strands.

Stage 5: Cut off the butts and bind down.
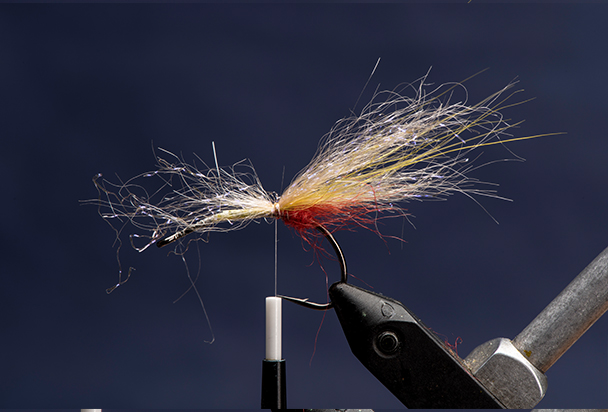
Stage 6: Again, tie in more Ice dubbing, this time a bit longer than the first bunch.

Stage 7: Again, fold it forward again and tie down to enclose the feelers with Ice Dub.
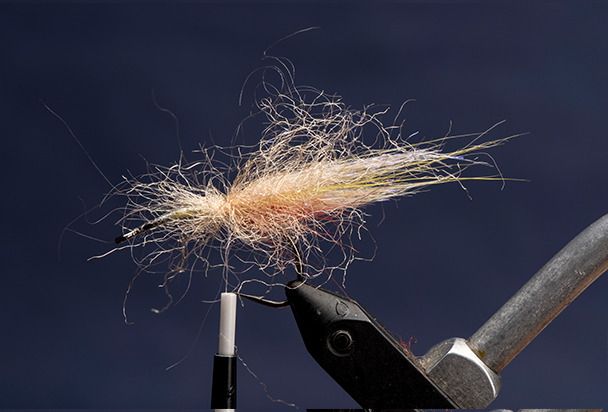
Stage 8: Now take a small bunch of Ice Dub and fold it roughly around the hook-shank. Fold this all forwards and tie down again.
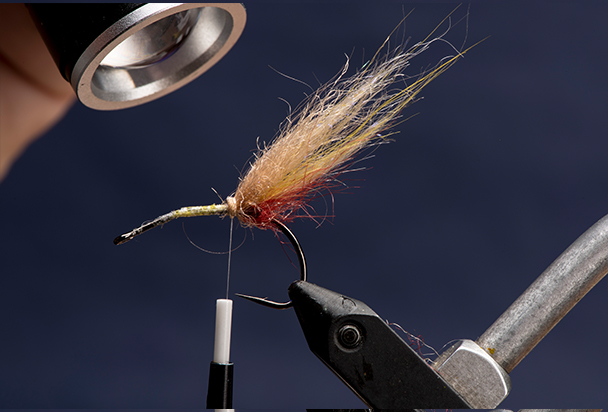
Stage 9: To ensure this apart of the fly stands up add some UV-cure resin around the base and cure with a torch.
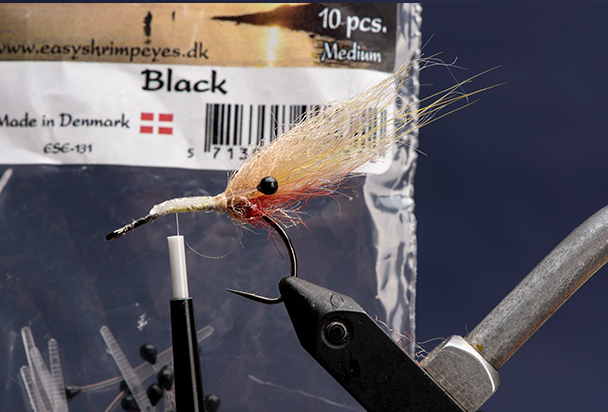
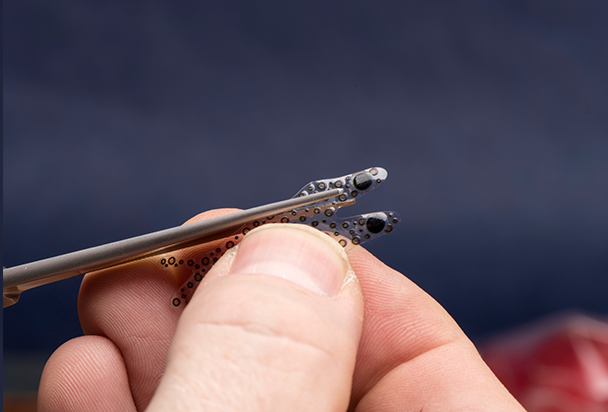
Stage 10: Tie in the Easy shrimp eyes. Tie them so they kick upwards off the bend. Cut away the waste.
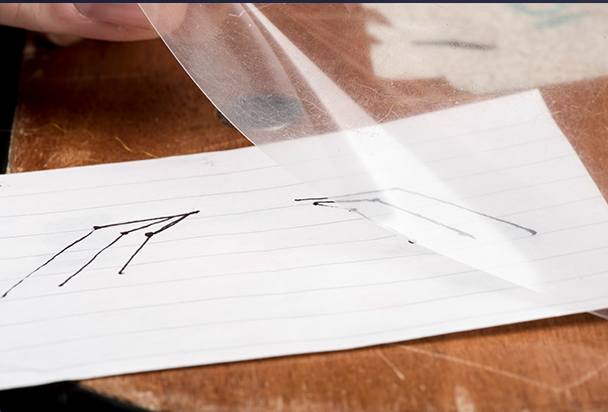
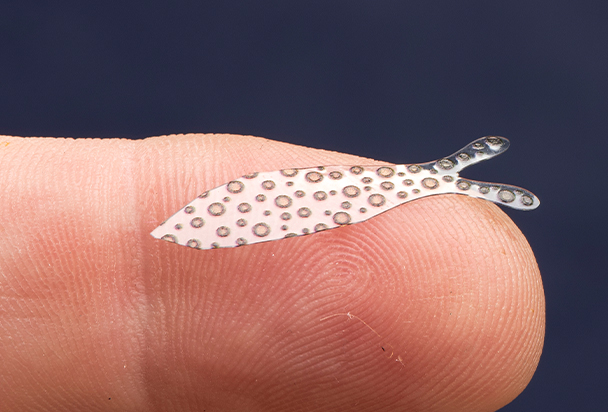
Stage 11: Now comes the trick for the legs. Draw three legs of the size style and arrangement you require on a piece of see-through greaseproof paper. Take a fine piece of foil, I use the one they wrap flowers in.
Stage 12: Take bracelet elastic (0.4mm). Cut off six pieces and make a knot in each. Place the knot on the greaseproof paper on the drawing, so you can see your drawing beneath it.
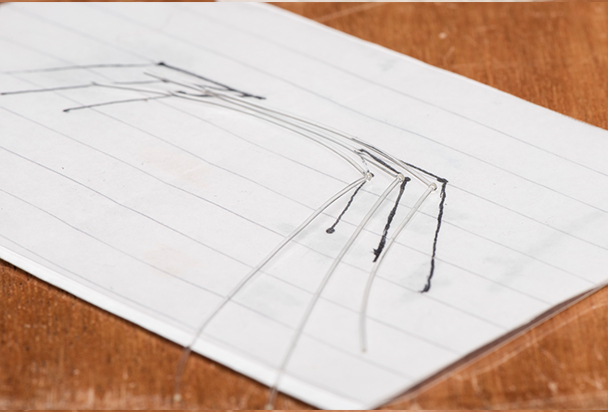
Stage 13: The legs lie down now with no pressure or tension on them and this technique make it easy for you to position, add a drop of glue to all three legs at the top of the legs.
Stage 14: Cure drop with the UV torch to bind all three legs together in the form you require. Now the legs can be tied in as one unit, perfectly straight and with ease.
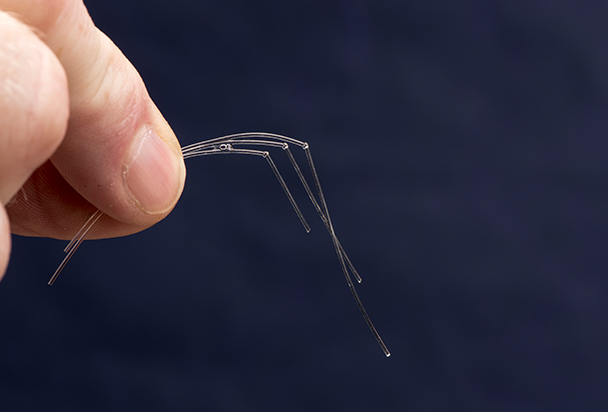
Stage 15: Now come forward with the resin applicator and add another drop where the tie-in point will be. Again, there will be no pressure or tension in the legs. Cure this also. Now you have a perfect set of three legs that will always sit straight.
Stage 16: Cut the ends of the legs to the desired length. Now tie the set of legs in on the side of the hook.
Stage 17: Add a set of legs to both sides. Bind the ends down to the hook-eye. Trim off any waste.
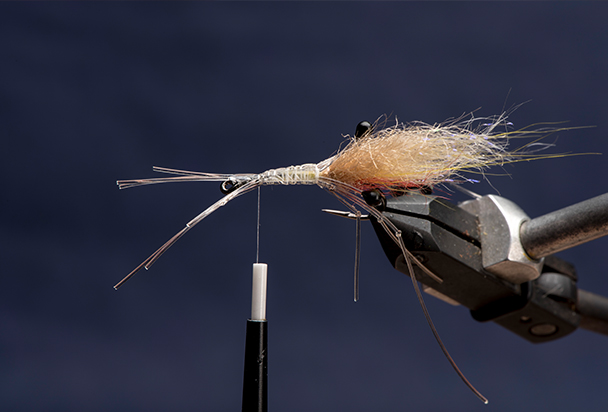
Stage 18: Dub Ice dubbing onto your thread. Dub the body up to the eyes.
Stage 19: Take a ready made Shrimp Shell, or cut one to shape like I have done here. These are from Pro Sportfisher but these days there are lots of amazing ones available.
Stage 20: Shaped and ready to use.
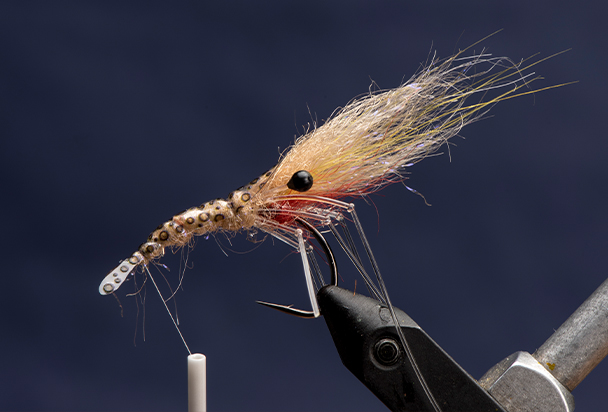
Stage 21: Using Dyneema thread means a separate rib is not required. Simply tie down the shell with a single wrap and pull down hard to crease it. Run thread down the hook-eye in open turns, pulling down tightly as you make each wrap. Trim excess thread.
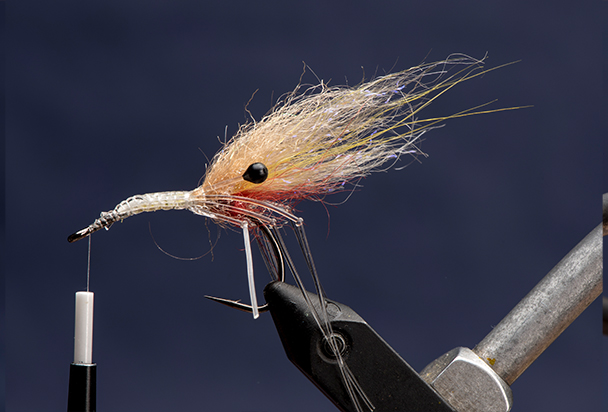
Stage 22: Fold back tail of shrimp over whip-finish to cover eye.
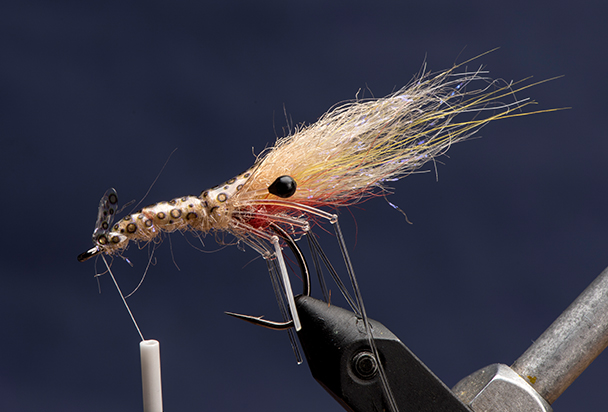
Stage 23: Cover the shell-back with Fine Flex to make the fly more durable.
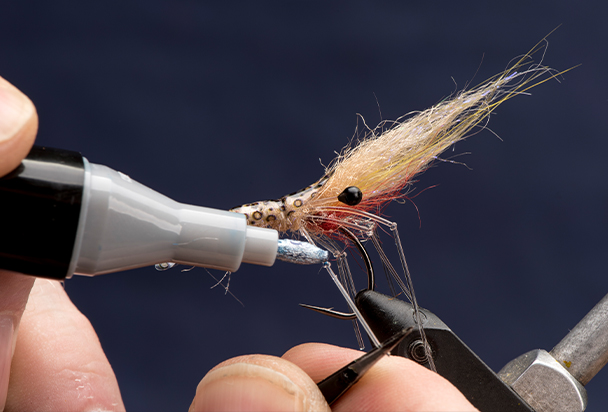
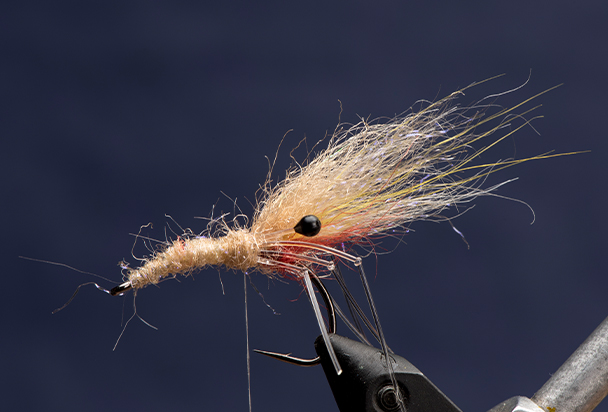
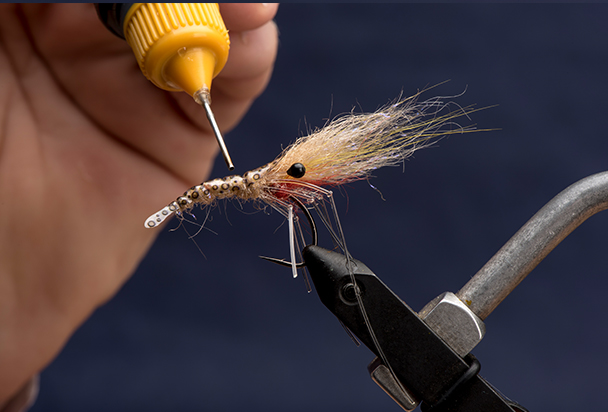
Stage 24: Take three different colours of your favourite marker pens. Apply small dots of colour to the legs; use blue on the knots. Tip: tensioning with a pair of tweezers makes it easier to colour them.
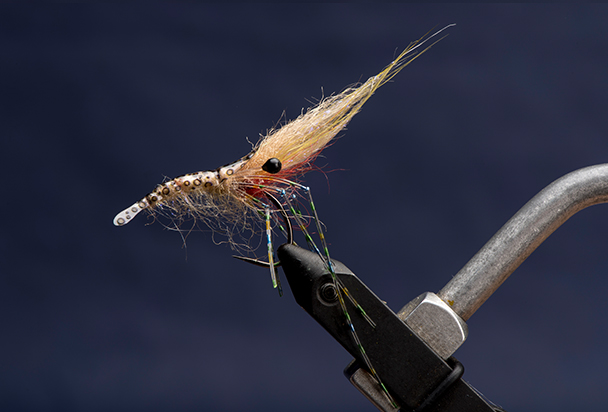
Stage 25: Add more dots. With the different colours the leg takes on a highly realistic look, which no fish can resist. Brush out with some Velcro on the underside and your fly is ready to fish.